Why we needed a DIY Goat Milking stand…
Surprise! We decided to add more goats to the homestead sooner rather than later! I’ve been waffling back and forth for a while on whether we wanted to add more goats or wait until our doeling, Olive, is old enough to breed. The problem with waiting for her to breed is that I WANT MILK. She won’t be able to breed until the beginning of next year at the earliest, and then it will still be five more months until she kids. So that puts us at a year from now for fresh milk.
Now that I am pretty comfortable with the dietary needs of our goats and see how simple it really is to care for them, I feel like adding a doe in milk (already producing milk) will be easy since we already have the setup, and will quickly offset the cost of joining a herdshare again. Plus with any excess, I can try my hand at cheese making, something I’ve always wanted to do 🙂 Home dairy has been a dream of mine from the moment I discovered homesteading. I remember staying up at night baking sourdough bread and cleaning the floors in our tiny house in California listening to podcasts about dairy goats… LOL. It feels like I’m coming full circle, and the best part is that I can provide my family with such a nutrient dense food, and teach the kids about another part of the food system.
Why goat’s milk?
As I mentioned, I have been dreaming about having a dairy animal since the day I discovered homesteading. However, a cow seemed too intimidating for someone who had no experience with farm animals, and the amount of milk a cow produces is just overwhelming. Then once we bought our property in VA it definitely cemented the idea of using goats or sheep for dairy because we simply do not have the room for a cow. Plus, being super new to dairy, I feel like a lot of the milk would end up going to waste because I wouldn’t be able to deal with the sheer volume of milk that a cow produces.
Plus, I love goats cheese and goats milk products, so it just makes sense! Mini goats are compact, adorable and hilarious, and not intimidating to my small children. Plus the Nigerian Dwarf milk is sweet and creamy (although my husband refuses to believe it).
Materials for DIY Goat Milking Stand
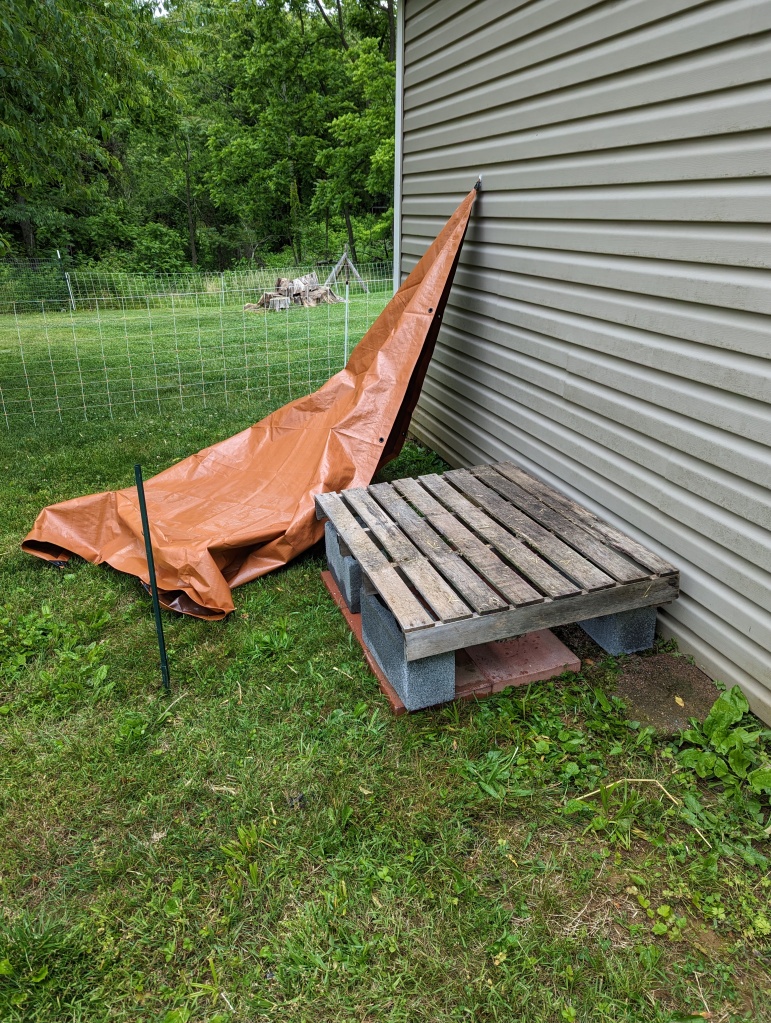
Pallet – For this project we used a full top pallet. If you can find a source for full top pallets, they’re much more convenient to use because you don’t have to fill in the gaps with extra wood.
Additional lumber – You will also need 4x4s for the legs, 2x4s for the supporting structure, and 1x6s for the horizontal part of the structure and where the feeder hangs onto the front.
Drill or impact driver and Phillips head screwdriver bit – I used an impact driver and self drilling screws because I didn’t want to spend extra time drilling. I will say, you run more risk of splitting the wood this way, but to me it was worth the time save because I built this basically within one naptime and one bedtime for my kids 😀
Outdoor screws – I used 2 1/2 inch and 2 inch screws on different areas of the project depending on how thick the wood was.

Circular saw – At first this seemed like an intimidating tool to use, but it’s really quite simple. Just make sure to wear safety glasses for flying wood! Also, if it’s not something that’s in your budget to buy new, I would suggest checking your local Habitat for Humanity ReStore. I got ours for FIVE BUCKS! All it needed was a new blade.

1/2 in x 8in bolt and 1/2 in hex nut – This will be used to hold the locking mechanism in place.
1/2 in drill bit – I chose to get this Milwaukee drill bit because it has the 1/4 in hex shank at the bottom which allows for use in the impact driver or regular drill. It was more expensive, but our drill isn’t very powerful so I wanted to be able to use it in the impact driver.
Hook and eye lock, or hook with chain – For now we are just using a hook and eye lock at the top, but I’m planning on switching this out for a hook with a small chain, to allow for bigger goats on the stand.
Hanging feeder – I used this 5qt over the fence feeder, and it fits right onto the front of the milking stand. This holds the feed while I’m milking, and it works perfectly.
How to build DIY Pallet Goat Milking Stand
It was really pretty easy to build this milking stand, but I did have a couple of hiccups and had to take apart the vertical structure once after building it and reconfigure, but I’ll explain that later. First step is to cut down the pallet. You don’t have to cut the pallet down, but if you leave it wide, you will end up needing larger pieces of the additional lumber. I cut it down so that there was basically one support beam on each side.

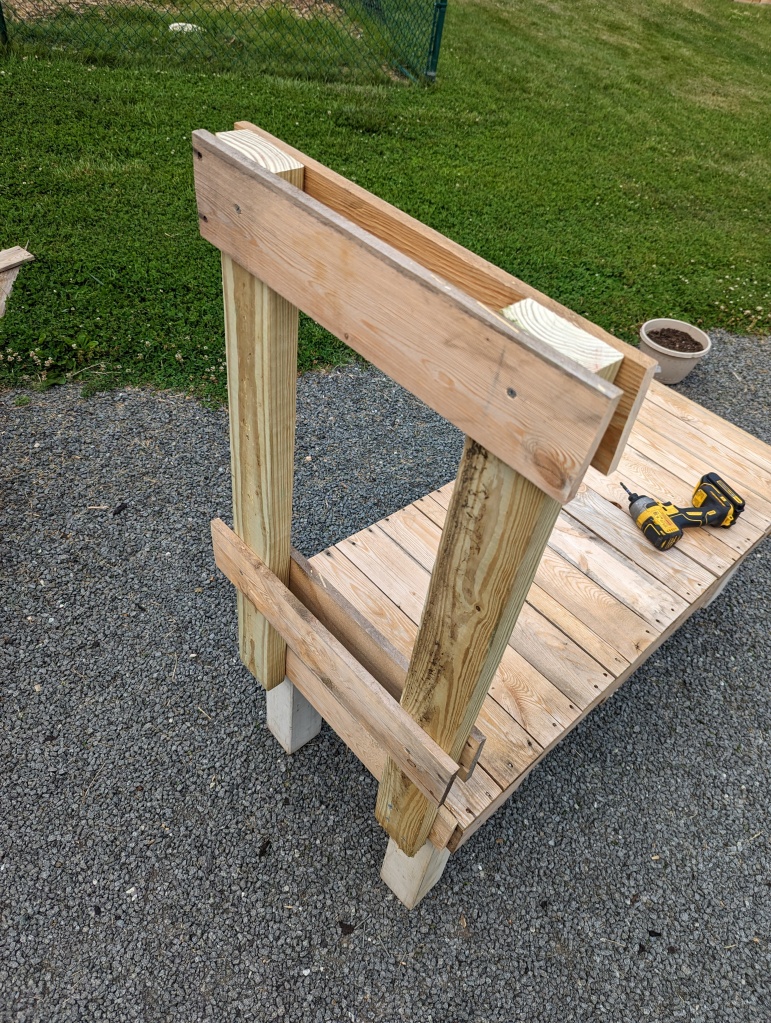
Then I cut the 4x4s to 18 inches each. I attached these by using a 2 1/2 inch deck screw in the top and the side of each one, for extra support. Then I broke additional planks off the leftover portion of the pallet to screw onto the front and back of the stand to cover up where it was open on the ends.


The next step was to start building the vertical structure. In the pictures below, I will show the method that I used to do the initial build, but I realized soon after that this was not going to work, because it was too narrow to be able to fit the locking mechanism. In later pictures, you’ll see that I then moved the 2x4s to the sides of the structure and turned them sideways, opening up the middle much more.
The vertical 2x4s are 36 inches each, just in case we ever decide to do full size goats vs minis. This will accommodate both.

I attached these with three 2 1/2 inch screws. In this initial build, I used more planks that I broke off the leftover pallet in order to make the horizontal part of the support. In the final build I used 1×6 board that I cut down to the proper size. The method was the same though. Place one plank on each side of the 2×4 and use a 2 inch screw to attach them.
Next I attached the headlock that will actually hold the goat in place during milking. When you’re looking at the stand head on, the 2×4 on the left will be stationary. The one on the right will be attached with the bolt and nut, so that you can open and close it. I basically slid the 2×4 in between the two 1×6 boards, and used 2 inch screws on each side of the top, and only the back side on the bottom. This left room for me to attach the feed bucket in front, because there was no screw in the way.

In this photo from the back of the milk stand, you can see how the 2×4 is basically sitting on the front of the milking stand, and is attached by screws in the top and bottom. The next step was to attach the moving part of the head lock. I took my half inch drill bit and made holes through each 1×6 board on the bottom. The middle of the bolt is 7 inches apart from the middle of the stationary 2×4.
For the mobile part of the headlock we happened to have a 2×3 stud that I used but you could just as easily use another piece of a 2×4. I also drilled a 1/2 inch hole into the bottom of this piece. Then I slid it down in between the 1×6 boards, and fished the bolt through the boards and the 2×3. Lastly, screwed the nut onto the other side.

The last two things I did were attach the eye hook at the top to hold the headlock in place while I’m milking, and jam the feeder onto the front. It took a little force to get it in between the 1×6 board and the stationary 2×4, but now it’s not going anywhere.


The DIY Pallet Goat Milking Stand has been working great for us so far, and the only thing I need to do now is build a little step for Nougat since we are currently using a big plastic case and she doesn’t like her hooves slipping on it.


And for the last pic… please enjoy a little Nougat smile as she was finishing up on the milking stand 🙂